今年的PAYPAl可谓是用力实足,接口虽与去年差别不大,但是仍然有小变动容易让开发者彩坑。
我提几点注意事项,方便大家在今年开发中少走点弯路。
如果你还没有开始PHP开发,分享不错的PHP向教学视频:https://www.youtube.com/watch?v=BD1dOWIABe0 虽然要翻墙看,推荐!
首先我用的包是官方的:composer requre “paypal/rest-api-sdk-php”。 (这份SDK里是有DEMO代码的在`Sample`目录里)
PP的流程:

一句话来说,确认订单的权利是交给开发者用户去触发的,而非支付平台自己确认。
手册地址:https://developer.paypal.com/docs/integration/direct/express-checkout/integration-jsv4/,看这一份就够了。
请求三部曲

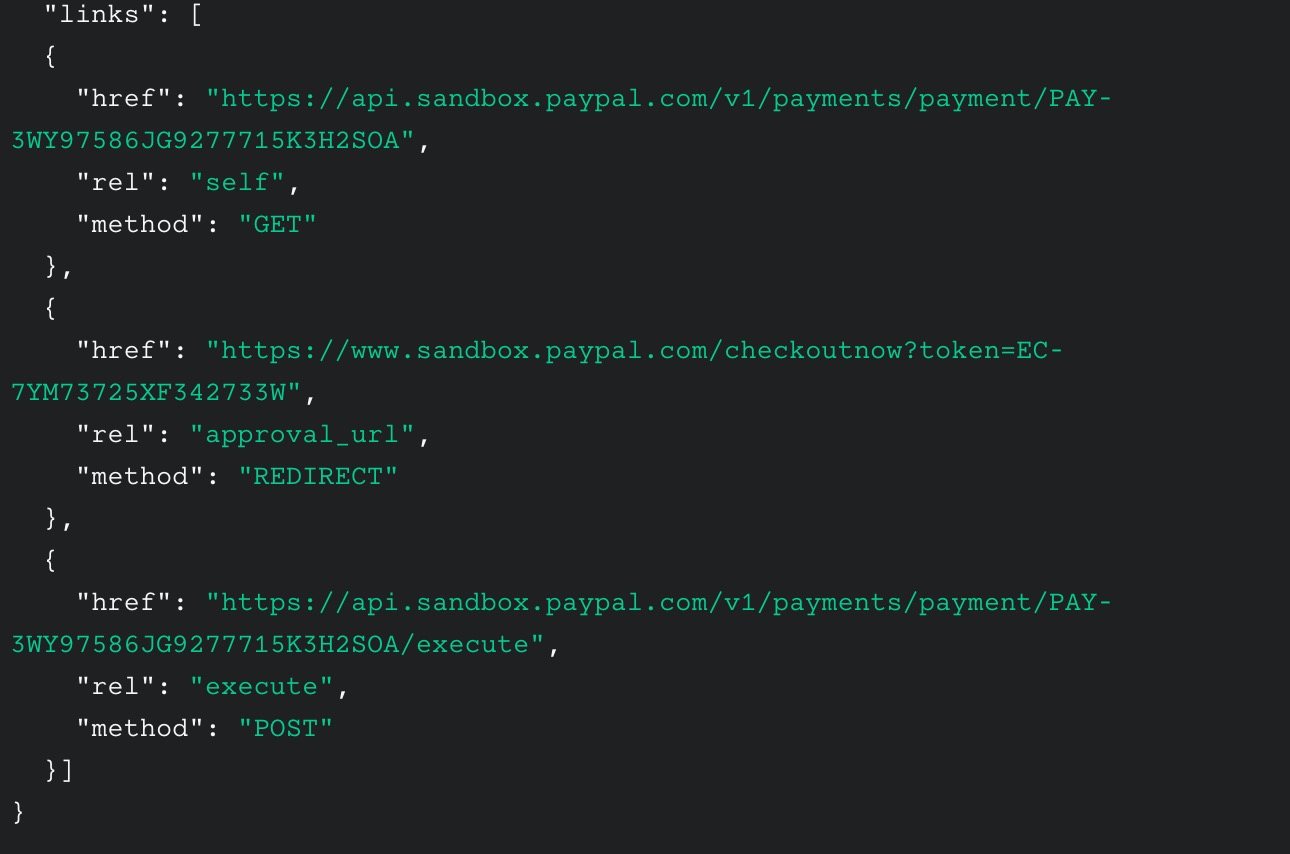
就三个请求搞定与PP的通信。分别是:发送订单信息、请求支付链接、确认支付。
说下开发者要做的事。首先根据项目需求设计合适的UI、场景。无论你是跳转支付(PHP)的方式还是弹窗的方式(JS),只是步骤上,JS比PHP多几个与自己服务器请求的次数而已(JS DEMO:https://developer.paypal.com/demo/checkout/#/pattern/server)。
说一下跳转支付:首先,开发者将订单信息准备好,请求PP创建订单,将PP返回的payment_id保存。再获取了支付链接,跳转到支付链接。待用户登录、支付后,PP会返回到你指定的return url。这时,你可以选择最终再显示一次订单确认页面,并等待用户点击确认。也可以直接就帮用户确认,只需要请求SDK的里Payment类的execute()就可以。这就是为什么不需要异步通知的原因,因为主动权在开发者手里。
 /**
     * 回调处理
     * 网址形式 /api/paypal/return?paymentId=PAY-16B92536VF524043RLEM3GBQ&token=EC-3TL85513UE657645V&PayerID=E5QWC82TQ2TDJ
     */
    public function callback()
    {
        // Get the payment Object by passing paymentId
        // payment id was previously stored in session in
        // CreatePaymentUsingPayPal.php
        $paymentId = $_GET['paymentId'];
        $payment = Payment::get($paymentId, $this->apiContext);

        // ### Payment Execute
        // PaymentExecution object includes information necessary
        // to execute a PayPal account payment.
        // The payer_id is added to the request query parameters
        // when the user is redirected from paypal back to your site
        $execution = new PaymentExecution();
        $execution->setPayerId($_GET['PayerID']);

        try {
            // Execute the payment
            $result = $payment->execute($execution, $this->apiContext);
            try {
                $payment = Payment::get($paymentId, $this->apiContext);
            } catch (Exception $ex) {
                return $this->returnAjax($ex->getMessage(), 2, ['code' => $ex->getCode()]);
            }
        } catch (Exception $ex) {
            return $this->returnAjax($ex->getMessage(), 3, ['code' => $ex->getCode()]);
        }

        if ($payment->getState() == 'approved') {

            $log = Paypal::where("payment_id", $paymentId)->first();
            $log->complete = 1;
            $log->save();

            $this->order = Ordering::find($log->order_id);
            $this->order->third_serial_number = $paymentId;
            $this->order->is_pay = 1;
            $price = $this->order->agent_use_balance > 0 ? $this->order->price - $this->order->agent_use_balance : $this->order->price;
            $this->order->amount = $price;
            $this->order->paymented_at = Carbon::now();
            //更新表
            $this->order->save();
            return $this->returnAjax("支付成功", 1);
        }
    }
注意事项
- 不需要IPN(Instant Payment Notification),不用考虑异步接收通知(Notify)。
- 记得在一开始把payment_id和你网站的order_id一起保存到一个独立的数据表。因为接下来PP的每一次请求返回的内容里都不会给你order_id。


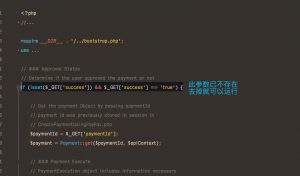
- return url时,没有
success、status这种传参了。但在官方DEMO里还有着错误示范 :/vendor/paypal/rest-api-sdk-php/sample/payments/ExecutePayment.php ,包括线上的WIKI:http://paypal.github.io/PayPal-PHP-SDK/。


